Most fabricators are looking for ways to ensure that their Jobs proceed according to a set sequence of steps. It can be tempting to create a new Activity Type for every step, but having too many Activity Types can cause confusion and inconsistency. It's usually best to keep Activities for the most critical steps.
When thinking of adding a new Activity you ask yourself: Does this need to be assigned to someone? Does this need to appear on a calendar? If the answer is no, it is often better to capture that information with checkboxes on a Form - or even a couple of different Forms.
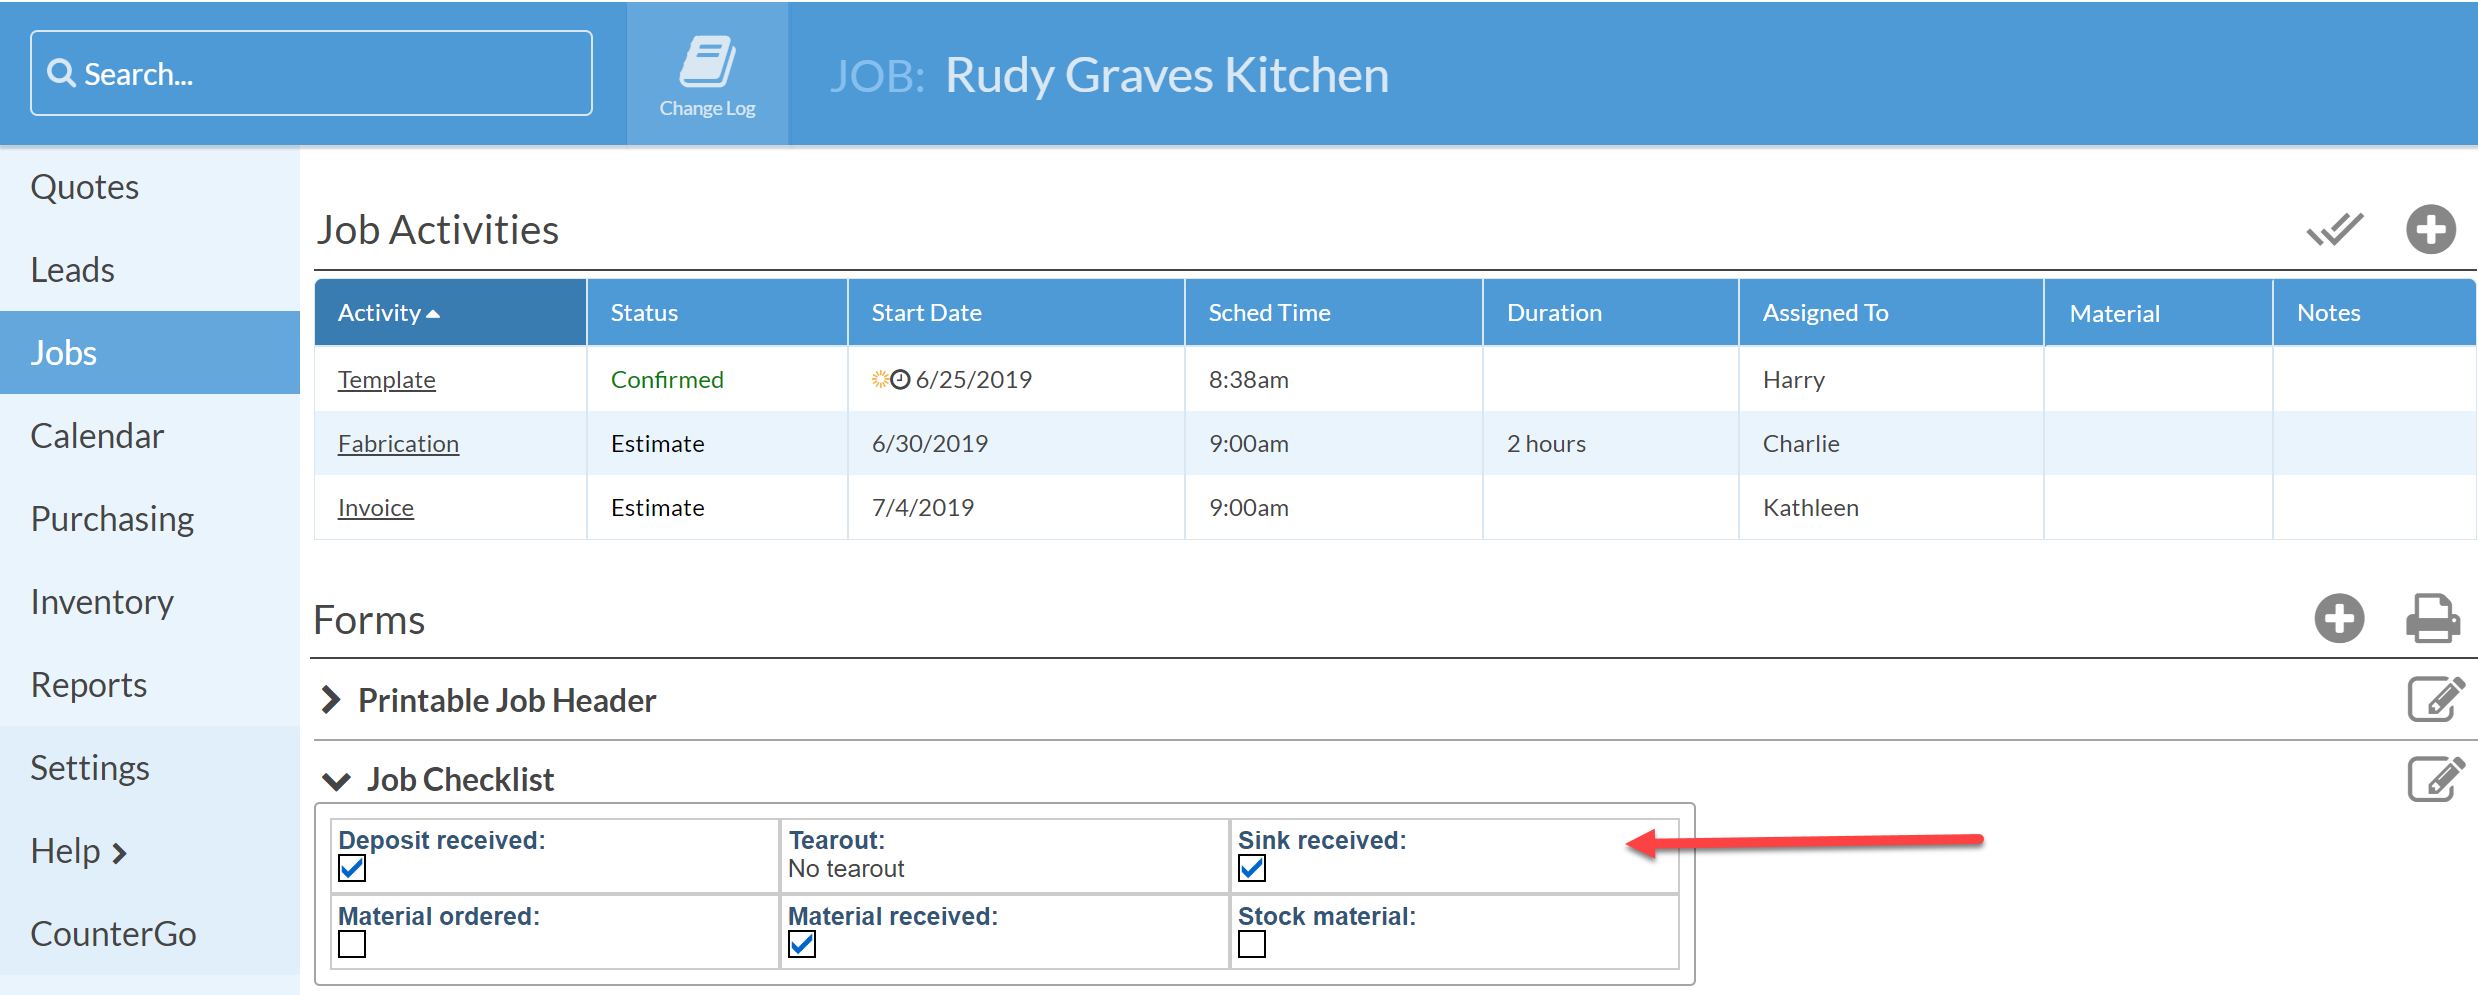
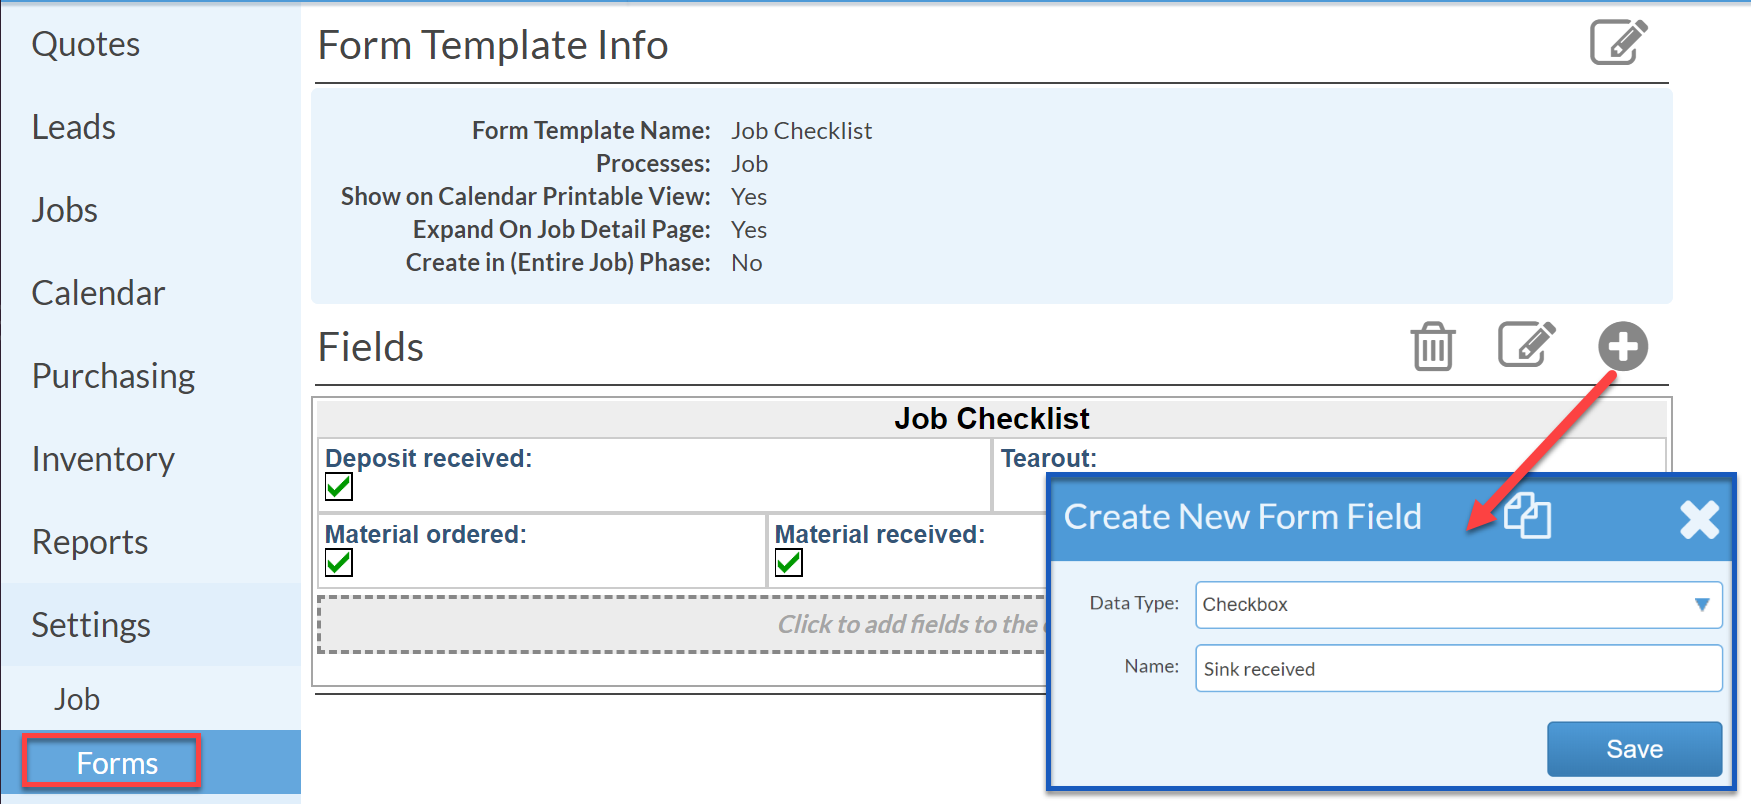
ADD A CHECKBOX TO AN EXISTING FORM
- Go to Settings > Job > Job Forms and click on the form you'd like to modify.
- Click the + to add a new field.
Choose Data Type: Checkbox. - Enter a Name and click Save.
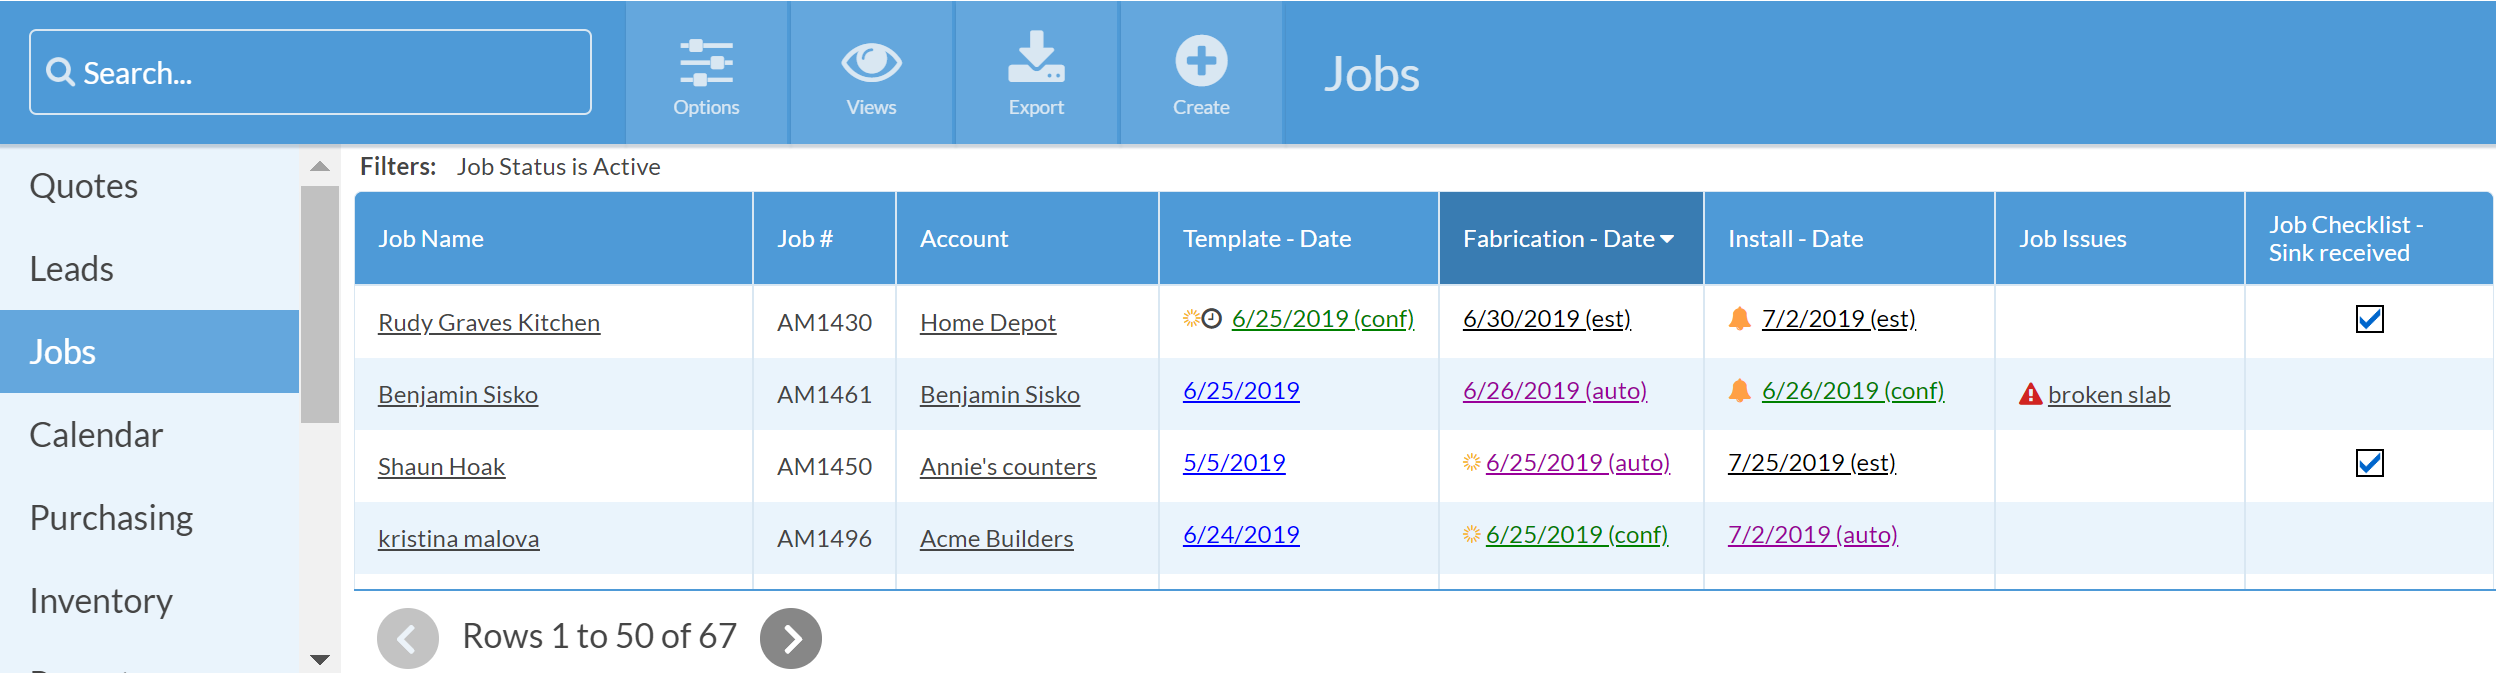
SHOW CHECKBOX IN A JOB VIEW
- Go to Jobs > Views and choose the View you would like to add the checkbox.
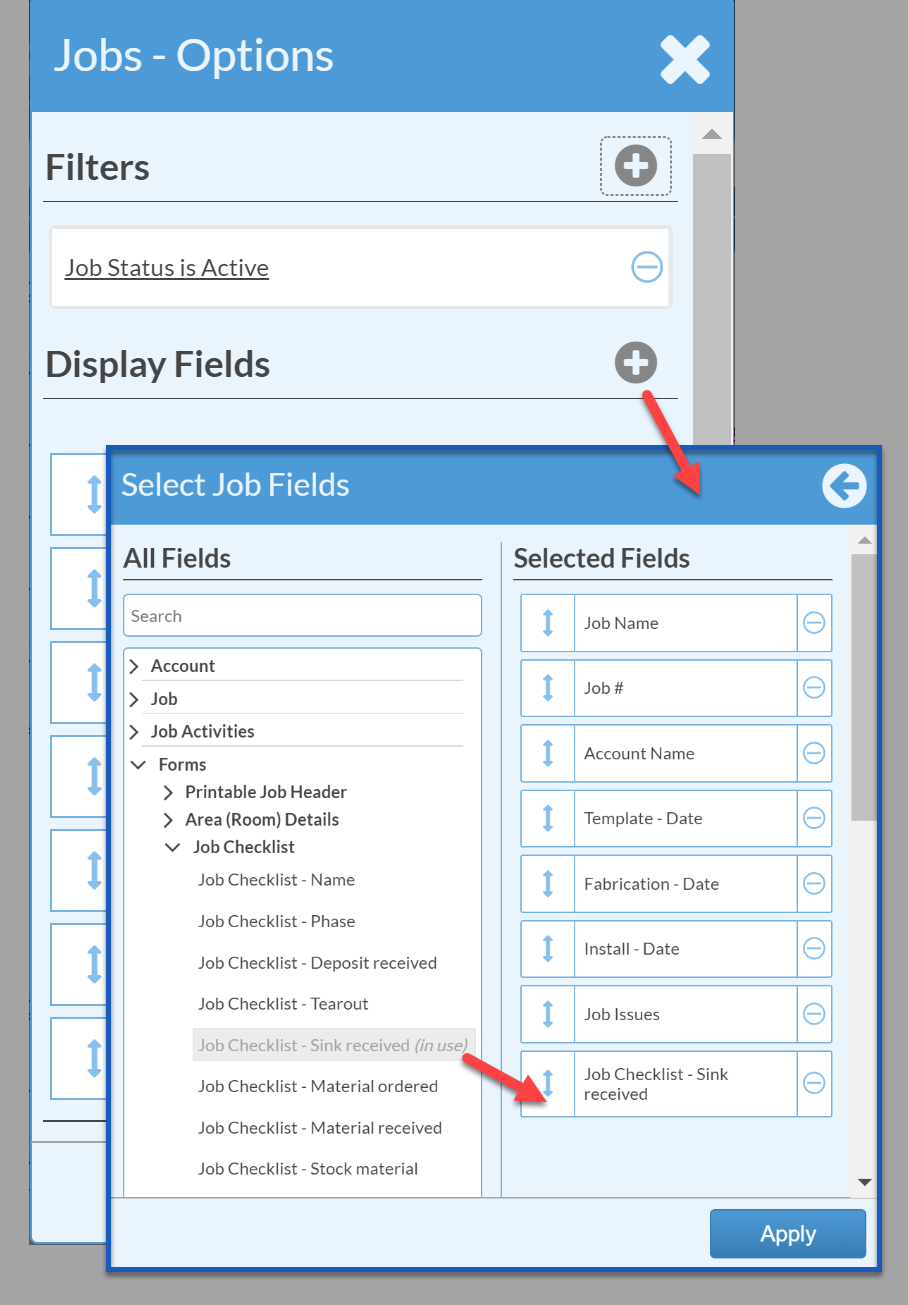
- Press Options and click the + to the right of Display Fields.
- From the left side list, find the new Form Field under "Form".
- Click on the Field name and click Apply.
It's easy to see at a glance which Jobs have that Field checked, and which don't. Be sure to save this View for quick access later.